Projectors have become an essential tool in the modern world for displaying presentations, videos, and other media to a larger audience. However, like any technology, they can encounter problems that can hinder their performance. These issues not only affect the quality of the display but also disrupt the flow of a presentation or event.
One common problem with projectors is image distortion or blurriness, which can be caused by various factors such as incorrect resolution settings or lens issues. Another issue is the lack of color accuracy, resulting in washed-out images or incorrect color representation.
In this guide, we will discuss these and other common display problems encountered with projectors, their possible causes, and how to troubleshoot them. We will also provide tips on preventing these issues from occurring in the first place.
Probable Causes of Image Distortion or Blurriness and How to Troubleshoot Them
Incorrect Resolution Settings
One of the main causes of image distortion or blurriness in projectors is incorrect resolution settings. This can happen when the projector's native resolution does not match the output resolution of the connected device, such as a laptop or DVD player. In this case, the projected image may appear stretched, pixelated, or out of focus.
Troubleshooting:
To resolve this issue, adjust the resolution settings on both the projector and the connected device to match their native resolutions. This can usually be done through the display or video settings on most devices.
If this does not solve the problem, try changing the HDMI or VGA cable connecting the two devices as a faulty cable can also result in incorrect resolution output.
In some cases, updating the projector's firmware may also help in correcting resolution issues. Refer to the user manual or contact the manufacturer for instructions on how to do this.
Dirty or Damaged Lens
Another possible cause of image distortion is a dirty or damaged lens. Over time, dust and debris can accumulate on the projector lens, affecting its clarity and focus. Additionally, scratches or cracks on the lens can also create blurriness in the projected image.
Troubleshooting:
To address this issue, first, try cleaning the lens with a soft, lint-free cloth and a gentle cleaning solution. Avoid using harsh chemicals or abrasive materials that can damage the lens further.
If there are visible scratches or cracks on the lens, it may need to be replaced. Contact the manufacturer or a professional technician for assistance with this.
Preventive measures such as regular cleaning and proper storage of the projector can help prolong the lifespan of the lens and prevent image distortion due to dirt or damage. Additionally, using a lens cover when not in use can also protect it from dust and other particles.
Faulty Cables or Connections
Faulty cables or connections can also result in image distortion or blurriness. Loose or damaged cables can cause signal disruptions, leading to a poor display quality.
Troubleshooting:
Start by checking all the cable connections between the projector and the input device. Make sure they are secure and free from any damage. If possible, try using a different set of cables to see if the problem persists.
Sometimes, the issue may lie with the input device itself. Try connecting it to a different projector or display screen to see if the image quality improves.
If none of these solutions work, there may be an internal issue with the projector's ports or circuitry. In this case, professional repair may be necessary.
Overheating of the Projector
Projectors generate a lot of heat during operation, and if not properly ventilated, it can lead to overheating. This can cause the image to appear blurry or distorted as the internal components struggle to function correctly.
Also, dust and debris can accumulate inside the projector, clogging the air vents and causing it to overheat.
Troubleshooting:
To avoid overheating, make sure the projector has enough space for proper ventilation. Clean any dust or debris that may have accumulated on the air vents or fans.
Additionally, if you are using the projector in a hot environment, consider using external cooling fans to help regulate the temperature.
If the projector continues to overheat, it may have a faulty cooling system or damaged internal components. In this case, seek professional repair services.
Unstable Mounting Position
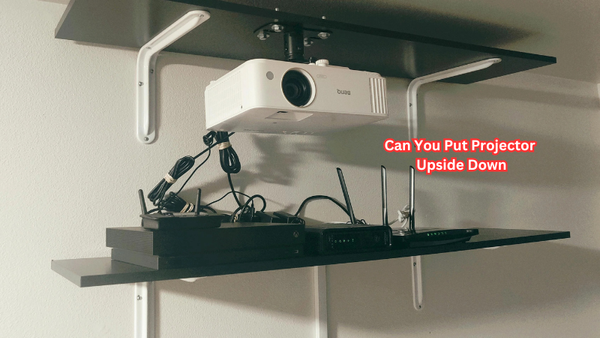
A projector needs to be mounted or placed in a stable position to ensure a clear and focused image. If the mounting surface is unstable, the projector may vibrate or shake, causing the projected image to appear blurry or distorted.
Troubleshooting:
Before starting a presentation, make sure that the projector is securely mounted on a stable surface. Check for any loose screws or bolts and tighten them if necessary.
If the projector is placed on a table, make sure it is not unsteady or wobbly. Consider using a tripod or other stabilizing devices if the surface is not suitable for mounting.
Another option is to adjust the projector's feet or use keystone correction to compensate for any slight and temperature lights tilting of the projector. However, this should only be used as a temporary solution and not for extended periods.
Defective Projection Screen
Sometimes, the issue may not lie with the projector itself but with the projection screen being used. A defective or damaged screen can affect image quality and cause distortion.
Troubleshooting:
Inspect the projection screen for any visible damages such as tears, wrinkles, or discoloration. If the screen is retractable, make sure it is fully extended and flat.
If there are any issues with the screen, try using a different one to see if the projected image improves.
Regularly cleaning and maintaining the projection screen can also help prevent image distortion and maintain its functionality. Avoid using harsh chemicals or abrasive materials when cleaning the screen.
Image Interference from Other Devices
Other electronic devices, such as speakers or wireless routers, can emit signals that interfere with the projected image. This interference can cause flickering or distorted images.
Troubleshooting:
To avoid this issue, try moving any electronic devices away from the projector. If possible, set up the projector and input device in an area with minimal electronic interference.
If the problem persists, consider using shielded cables or installing ferrite cores on the cables to reduce signal interference. These can be purchased separately and attached to the cable ends.
In extreme cases, there may be electromagnetic interference in the location itself. In this case, it may be necessary to change the location of the presentation or use a different type of projector that is less susceptible to interference.
Tips for future maintenance
To prevent future issues with image distortion, here are some tips for maintaining your projector:
- Regularly clean the lens and external surfaces of the projector using a soft cloth.
- Store the projector in a cool, dry place when not in use to avoid dust accumulation and potential damage from humidity.
- Avoid exposing the projector to extreme temperatures or direct sunlight. This can cause internal components to overheat and affect image quality.
- Inspect the cables and connections periodically for any signs of damage or wear. Replace them if necessary.
- If the projector has a filter, clean or replace it according to the manufacturer's instructions.
- Regularly check for software updates and install them if available. This can help improve the overall performance of the projector.
By following these tips and properly troubleshooting any issues, you can ensure that your projector continues to produce clear and high-quality images for all your presentations or viewing needs.
Can't find a solution?
If you have tried all of the troubleshooting tips above and are still experiencing image distortion, it may be time to seek professional help. Contact the manufacturer or a certified technician for further assistance and repairs.
Remember to always handle your projector with care and perform regular maintenance to prolong its lifespan and maintain its functionality. With proper care and attention, your projector can continue to provide clear and crisp images for all your projection needs.
FAQs
What is the average lamp life of a projector bulb, and how can I check the remaining lamp hours?
The projector lamp life of a projector bulb can vary depending on the model and usage. On average, projector bulbs have a lifespan of around 2,000 to 5,000 hours. To check the remaining lamp hours, navigate to the projector's settings menu or consult the user's manual for instructions specific to your projector model.
Why is the indicator LED light on the control panel of my projector flashing?
When the indicator LED power light on the control panel of your projector is flashing, it usually indicates a problem with the device. It could be related to the lamp, temperature issues, or other technical malfunctions. Refer to the user's manual or contact customer support for troubleshooting steps to resolve the specific issue indicated by the flashing LED light.
How do I adjust the picture size on my projector display?
To adjust the picture size on your projector display, you can use the controls on the projector's control panel or the remote control. Look for options such as "Picture Size," "Zoom," or "Aspect Ratio" in the menu or on the remote control. Experiment with different picture size settings until you achieve the desired picture size. Additionally, some projectors offer keystone correction features to adjust the image geometry.
Why is there no display on my projector screen when using HDMI or VGA connections?
If there is no lcd projectors on your projector screen when using HDMI or VGA connections, first ensure that the cables are properly connected to both the projector and the video source. Double-check that the input source selected on the projector matches the connection you are using (HDMI or VGA).
Conclusion
In conclusion, image distortion can be caused by various factors such as damaged internal components, overheating, unstable mounting positions, and interference from other devices. By following the troubleshooting tips provided in this document and properly maintaining your projector, you can prevent and resolve issues with image distortion.
If all else fails, seek professional assistance to ensure optimal performance of your projector. With the right care and maintenance, your projector can continue to deliver high-quality images for all your projection needs.
So no matter what type of projector you may have, it's important to regularly check for any issues and take necessary steps to resolve them in order to ensure a seamless projection experience every time. Happy projecting!


