Splicing speaker wire is a fundamental skill for anyone setting up a home audio system or installing a sound system in a vehicle. Properly spliced speaker wire ensures a secure connection and optimal audio performance.
Whether you're extending, repairing, or customizing your speaker setup, mastering the art of splicing wire is essential. From selecting the right tools to understanding the best techniques for stripping, twisting, and soldering, this guide will walk you through the step-by-step process of achieving clean and reliable speaker wire splices.
With the right knowledge and attention to detail, you can elevate your audio experience by seamlessly connecting your speakers with confidence and precision.
Why Splice Speaker Wires?
Before diving into the steps of splicing speaker wires, it's important to understand why this skill is necessary. There are a few reasons why you might need to splice speaker wires:
- Cable Length: The standard speaker wire length that comes with most systems may not be enough for your specific setup. Splicing allows you to extend the length of your wire without having to purchase additional cables.
- Customization: If you're building a custom speaker system, splicing gives you more control over the length and configuration of your wires. This allows for a neater and more organized setup. Bare wires can also be easier to hide and route compared to longer pre-made cables. Bare wire splices also have a lower profile, making them ideal for tight spaces.
- Damage Repair: In some cases, speaker wires may become damaged or frayed due to wear and tear or accidental damage. Instead of replacing the entire wire, splicing allows you to repair just the damaged section.
- Multiple Speaker Connections: Splicing also allows for connecting multiple speakers to a single output. This is useful in setups where there are multiple speakers in close proximity or when using a splitter to connect different devices. Connecting speaker wire in this way can also help reduce clutter and improve organization. Crimp connectors can be used to connect multiple wires in a clean and secure manner.
- Improved Sound Quality: Properly spliced speaker wire ensures a strong connection, leading to better audio quality. This is especially important for high-end sound systems where every detail matters.
Now that we understand the benefits of splicing speaker wires, let's dive into the process itself.
How to Splice Speaker Wire?
Splicing speaker wire involves a few key steps that require the right tools and techniques to achieve a clean and reliable connection. Here is a step-by-step guide to splicing speaker wire:
1. Gather Your Tools and Materials
Before you begin splicing, make sure you have all the necessary tools and materials on hand. Here's what you'll need:
- Wire cutters: For cutting and trimming the wire to the desired length. It's important to use sharp wire cutters to prevent fraying or damaging the wire.
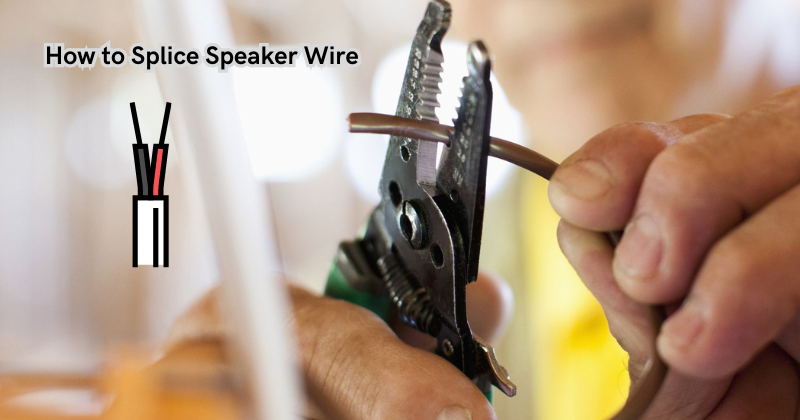
- Wire strippers: These specialized tools are designed to remove the insulation from the end of the wire without damaging the copper strands. Using a blunt object, such as a knife, can result in damage to the wire and affect audio performance.
- Pliers: These are useful for twisting and shaping the exposed copper strands of the wire for a secure connection.
- Soldering iron: This tool is used for creating a permanent and strong connection between wires. A soldering iron melts metal alloy (solder) to fuse two wires together, resulting in a clean and reliable splice.
- Heat shrink tubing: This is a protective covering that can be placed over the soldered connection to ensure it remains secure and insulated.
- Electrical tape: This can be used as an alternative to heat shrink tubing for insulation and protection against damage or short circuits.
Measure and Cut the Wire
Measure and cut the wire to your desired length, ensuring you have enough for both ends of the splice.
Make sure to leave an extra 1-2 iches on each end for twisting and soldering. When splicing speaker wire, it's important to use the same gauge (thickness) wire for both ends to maintain a consistent and balanced audio signal. Existing wire can also be used to extend or repair wires that are already in place.
Strip the Wire
Using your wire strippers, carefully strip about half an inch of insulation from each end of the wire. Be sure not to damage or cut any of the copper strands. Wire nuts can also be used to connect the bare ends of spliced wires without soldering.
Solder the Wires
Preheat your soldering iron and apply a small amount of solder onto the tip. Carefully touch the tip of the iron to the twisted wires, allowing the heat to melt the solder and create a secure connection. Be careful not to touch the iron directly to the wire, as this can cause damage.
Stereo system wire can be used to connect two speakers to a single output, allowing for greater flexibility in placement. Solid core wire should not be used for splicing as it can break when bent, resulting in a weak connection.
Insulate the Connection
Once the wires are soldered together, slide a piece of heat shrink tubing over the soldered area and use a heat source (such as a heat gun or lighter) to shrink it down and seal the connection. If desired, you can also wrap the connection with electrical tape for extra protection.
Attach crimp connector pins to the bare wire ends for a secure and clean connection. Positive wire connections should have red heat shrink tubing or be marked with a "+" symbol for easy identification. Wire nut connections should also be labeled for polarity. Butt connectors can also be used for splicing, providing a quick and simple solution.
Test the Connection
Before finalizing your splice, it's important to test the connection and make sure there are no issues with audio transmission.
Connect the speaker wires to your system and play some music or a sound test to ensure everything is working properly. If there are any issues, double check your connections and make adjustments as needed.
Tips for Splicing Speaker Wire
Now that you know how to splice speaker wire, here are a few tips to keep in mind for the best results:
- Use the right gauge wire: Make sure to use the same gauge wire for both ends of your splice to maintain a consistent and balanced audio signal.
- Ensure clean connections: Before soldering, make sure the exposed copper strands are twisted together tightly for a secure connection.
- Be careful with heat sources: When using a soldering iron or heat gun, be careful not to apply too much heat or touch the wire directly, as this can cause damage.
- Label your connections: To easily identify positive and negative wire connections, use color-coded heat shrink tubing or labels for polarity.
- Test before finalizing: Make sure to test the connection before sealing it off to ensure there are no issues with audio transmission.
FAQs
Can I use electrical tape instead of heat shrink tubing for insulation?
Yes, electrical tape can be used as an alternative to heat shrink tubing for insulation and protection against damage or short circuits. Plus, it's easily accessible and can be found in most hardware stores.
What is a substitute for speaker wire?
If you don't have speaker wire on hand, you can use other types of wire as a substitute. Keep in mind that solid core wire should not be used for splicing as it can break when bent, resulting in a weak connection. You can also use stereo wire to connect two speakers to a single output for added flexibility.
What wire is best for speakers?
The best wire for speakers is usually oxygen-free copper (OFC) wire, as it has a high conductivity and low resistance which results in cleaner audio signals. Additionally, make sure to use the same gauge wire for both ends of the splice to maintain a balanced audio signal.
Can I splice different gauges of wire together?
It's not recommended to splice different gauges of wire together, as this can affect the audio signal and result in an unbalanced or distorted sound. It's best to use the same gauge wire for both ends of the splice.
Conclusion
In conclusion, mastering the technique of splicing speaker wire empowers you to customize and optimize your audio setup with confidence.
By following the proper procedures for stripping, twisting, and soldering, you ensure secure connections that promote optimal signal transmission and audio fidelity.
Whether you're extending wires to accommodate a larger space or repairing damaged cables, the knowledge and precision applied to splicing speaker wire directly impact the performance of your sound system.
As you hone this essential skill, you gain the ability to tailor your speaker configurations to your specific needs, creating a seamless and reliable network of audio components.
With attention to detail and adherence to best practices, you can elevate your listening experience and enjoy the full potential of your speakers, knowing that your splices are executed with expertise and care.


