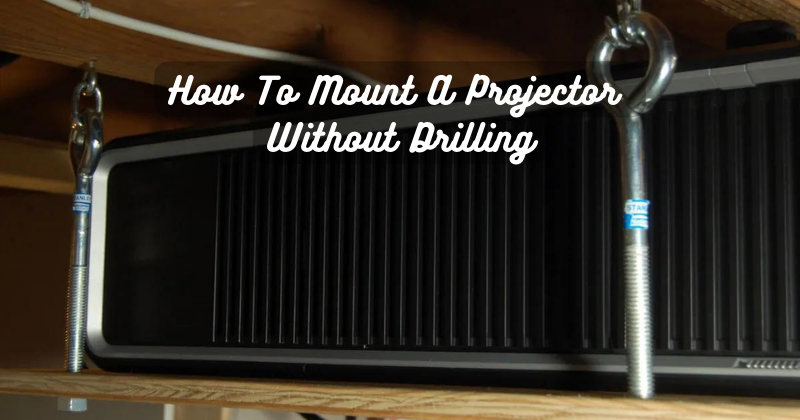
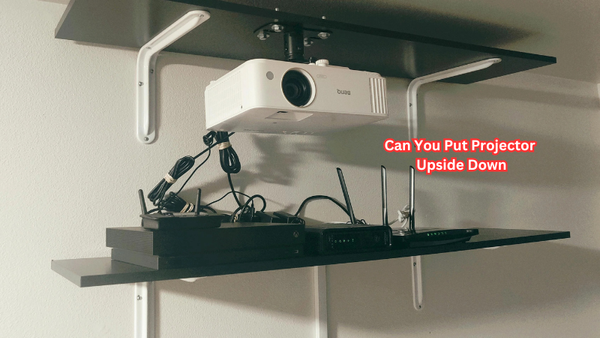
Mounting a projector without drilling offers a versatile solution for those seeking an immersive home theater or presentation setup without causing structural damage. This innovative approach involves adhesive hooks, ceiling grids, or specialized mounts designed for non-invasive installation. Individuals can seamlessly integrate a projector into their living spaces by eliminating the need for drilling without compromising aesthetics or incurring potential repair costs.
This introduction will guide you through mounting a projector without drilling, providing a hassle-free alternative for renters, temporary setups, or those who prefer a non-permanent installation. Explore these practical techniques to achieve a secure and visually appealing projector setup that meets your specific needs and enhances your audio-visual experience.
How To Mount A Projector Without Drilling: Step-by-Step Guide
There are several ways to mount a projector without drilling, each with unique advantages and easy-to-follow steps. Whether you want to suspend your projector from the ceiling or attach it directly to the wall, these methods will provide a stable and secure mounting solution without damaging your walls or ceilings.
Adhesive Hooks
Adhesive hooks are one of the easiest ways to mount a projector without drilling. These compact and sturdy hooks are widely available and can be found in most hardware or home improvement stores. They come in different sizes, shapes, and weight capacities, making them suitable for various projector models.
To mount a projector with adhesive hooks, follow these steps:
- Identify the ideal location on the wall or ceiling for your projector.
- Clean the surface of any dust, grease, or residue that could affect adhesion.
- Firmly press the adhesive hook onto the surface and hold it for at least 30 seconds to ensure proper adhesion.
- Allow the adhesive to set as the manufacturer recommends before hanging the projector.
- Hang the projector using a mounting plate or universal mount compatible with your projector model.
- Adjust the angle and height of the projector as desired for optimal viewing experience.
- Test the stability of the setup by gently shaking or tapping the projector to ensure it is securely attached.
- Connect all necessary cables and wires for power and video source.
- Enjoy your new projector setup without worrying about drilling holes or damage to your brick wall or ceiling.
Ceiling Grids
Another non-invasive mounting option for projectors is using ceiling grids. These grids are typically made of lightweight and durable materials, such as metal or plastic, and can be easily attached to the ceiling with adhesive strips or hooks. T
hey provide a convenient way to suspend your projector from the top without causing any damage. Adequately cover wires; you can use a Uppleva cable cover strip to hide wires. For LED projector installations, you can use LED strip lights to provide additional lighting and ambiance.
To mount a projector using ceiling grids, first, mark the desired location on the ceiling and clean the surface. Apply adhesive strips or hooks, firmly pressing them into place. Install the ceiling grid onto these attachments and hang the projector using a compatible mount. Adjust the angle and height for optimal viewing, test stability, connect cables, and enjoy a drill-free projector setup with no ceiling damage.
Specialized Non-Invasive Mounts
Specialized non-invasive mounts are available for those seeking a more professional and secure mounting option. These mounts are designed explicitly for projectors and offer a sturdy and reliable solution without requiring drilling or permanent installation. They come in various designs, including adhesive mounts, ceiling attachments, and wall mounts with adjustable arms.
To mount a projector using specialized non-invasive mounts, follow these steps:
- Choose the appropriate mount for your projector model and desired location.
- Clean the surface of any dust or debris that could affect adhesion.
- Follow the manufacturer's instructions to attach the mount to the surface properly.
- Hang your projector from the mount using the designated attachment points.
- Adjust the angle and height of the projector as needed for optimal viewing experience.
- Test the stability of the setup before connecting any cables or wires.
- Connect all necessary cables and wires for power and video source.
- Enjoy your new projector setup without damaging or altering your walls or ceiling.
Use a Shelf Mount or Table Stand
You can use a shelf mount or table stand to avoid attaching your projector to the wall or ceiling. These mounts are designed to sit on a flat surface and provide a stable base for your projector. They come in various sizes and styles, making them suitable for different projectors. Ikea lack shelf unit is a popular choice among DIY enthusiasts, providing a sturdy and affordable option for mounting projectors. In small living room spaces, you can use a projector stand to save space and achieve a clean, non-invasive setup. Command picture hanging strips can also be used to secure the projector stand or shelf to the surface without drilling.
For a hassle-free projector installation using a shelf mount or table stand, start by selecting a flat and robust surface. Ensure cleanliness by clearing away any dust or debris. Position the shelf mount or table stand securely on the designated spot. Attach the projector to the mount using suitable attachments and make adjustments to the angle and height for an ideal viewing experience. Before connecting cables, test the stability of the setup. Finally, connect all essential cables for power and video source, providing a damage-free projector setup.
Use an L-Shaped Stand with Hooks
If you prefer a more portable option for your projector, an L-shaped stand with hooks is another excellent choice. This mount type has adjustable hooks and can easily be moved and repositioned. It also provides a stable base and eliminates the need for drilling or permanent installation. L shaped hook stand is a commonly used option for this mount type. Hanging strips can be used to keep the stand in place, providing a secure and non-invasive mounting solution.
To mount a projector using an L-shaped stand with hooks, follow these steps:
- Assemble the L-shaped stand according to the manufacturer's instructions.
- Adjust the hooks to fit your projector model and desired angle.
- Place the stand on a flat surface like a table or shelf.
- Hang your projector from the hooks on the stand.
- Test the stability of the setup by gently shaking or tapping the projector.
- Adjust the hooks as needed for a secure fit.
- Connect all necessary cables and wires for power and video source.
- Enjoy your new projector setup without any damage to your walls or ceiling.
Drywall Anchors and DIY Plywood Wall Mounting
For those who are comfortable with DIY projects, another option for mounting a projector on a wall is using drywall anchors and DIY plywood mounts. This method involves creating a custom mount out of plywood and attaching it to the wall using heavy-duty drywall anchors.
It offers a sturdy and secure solution without causing any damage to your walls. A projector screen is a popular choice for this type of mount. Also brick clamps can be used to provide a secure surface for the plywood mount. A drywall anchor can hold up to 50 pounds of weight, making it a reliable choice for mounting projectors.
To mount a projector with drywall anchors and a DIY plywood system, start by cutting a plywood piece to the required size, affix heavy-duty drywall anchors to its back, and mark the projector's placement on the wall.
Secure the plywood mount to the wall using a drill and the drywall anchors. Hang the projector with compatible attachments, adjusting angles and height for optimal viewing. Prior to cable connection, ensure stability through a test. Finally, connect all essential cables for power and video source, completing a reliable and personalized projector installation.
Projector mounting does not have to be a complex and permanent process. With the various non-invasive mounting options available, you can easily set up your projector without causing any damage or alterations to your walls or ceiling.
Choose the method that best suits your needs and enjoy your new projector setup hassle-free. You can search google play mantistek for the lastest version. And may be you can contact mantistek official store if any questions about the tripod mount, they will give you a satisfied answer.
FAQs
How do you mount a projector renter friendly?
Several renter-friendly options for mounting a projector include specialized non-invasive mounts, shelf mounts or table stands, L-shaped stands with hooks, and drywall anchors with DIY plywood mounting. These methods do not require drilling or permanent installation, making them suitable for renters.
Is humidity bad for a projector?
High humidity can be harmful to a projector if it is not adequately ventilated. Moisture in the air can cause condensation inside the projector, damaging its internal components and affecting its performance.
What should be the distance between a projector and a wall?
The optimal distance between a projector and a wall depends on the size and resolution of the projector, as well as the desired screen size. Generally, there should be at least 1-1.5 times the width of the projected image between the projector and the screen or wall.
Can I mount a projector on a drop ceiling?
Yes, you can mount a projector on a drop ceiling using specialized mounts designed to attach to the ceiling grid. Ensure that the weight and size of your projector are compatible with the mount, and always follow the manufacturer's instructions for proper installation.
Conclusion
In conclusion, opting to mount a projector without drilling opens up a realm of possibilities for a seamless and reversible installation. Whether utilizing adhesive hooks, ceiling grids, or alternative mounting solutions, the process allows for flexibility in placement without causing structural damage. This approach caters to renters, those in temporary spaces, or individuals aiming to preserve the integrity of their walls and ceilings.
By adhering to inventive techniques and non-invasive methods, users can achieve a professional and stable projector setup. The absence of drilling not only simplifies the installation process but also ensures that the viewing environment remains aesthetically pleasing. Embracing these drill holes free options empowers individuals to create immersive audio-visual experiences without compromising the structural integrity of their living spaces.


