Achieving a flawless application of a screen protector involves the art of bubble removal. The initial step is to meticulously clean the device screen to rid it of any particles that may lead to bubble formation.
They gently lift one corner of the protector and use a soft cloth or squeegee to coax the air bubbles towards the edges while applying light pressure aids in their elimination.
By repeating this process systematically, you can ensure a smooth, bubble-free surface, enhancing both the protection of your device and the clarity of its display.
Why is it Important to Remove Air Bubbles from Screen Protector?
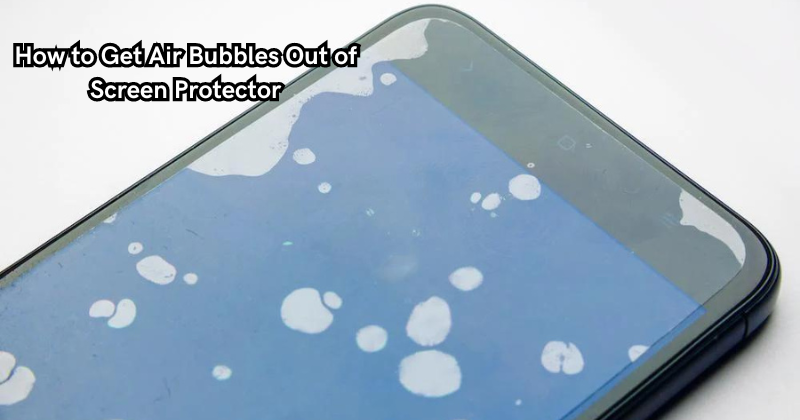
Air bubbles not only create an unsightly appearance on the screen protector, but they can also hinder the viewing experience and potentially compromise the protection of your device. When air bubbles are left under the screen protector, they may cause lifting or peeling at the edges, leaving gaps for dust and debris to enter and potentially scratch the device screen.
Additionally, air bubbles can distort or block the display, making it difficult to read or use the device effectively. Therefore, taking the time to remove air bubbles properly is essential for both aesthetics and functionality. Furthermore, a properly applied screen protector can also help maintain the resale value of your device.
Why Do Bubbles Form?
Bubbles can form during the application of a screen protector due to various factors. Some common reasons include not cleaning the device screen thoroughly enough, using too much pressure during application, or using an inferior quality screen protector. Using a low-quality or poorly sized screen protector can also cause bubbles as it may not adhere properly to the device's surface.
Furthermore, environmental factors such as humidity or dust particles in the air can also contribute to bubble formation. Therefore, it is essential to carefully prepare the device and work area before applying a screen protector to minimize the likelihood of bubbles. Tempered glass screen protectors are known to be less prone to bubble formation due to their rigidity and ability to adhere more easily. Tempered glass screen protector installation kits also often include tools specifically designed to help remove bubbles.
How to Get Air Bubbles Out of Screen Protector
Now, let's dive into the steps for removing air bubbles from a screen protector:
Prepare the device and work area:
Before beginning the screen protector application process, ensure that your device is clean and free of any dust or debris. Also, choose a well-lit and dust-free environment to minimize the risk of bubbles forming.
Clean the device screen:
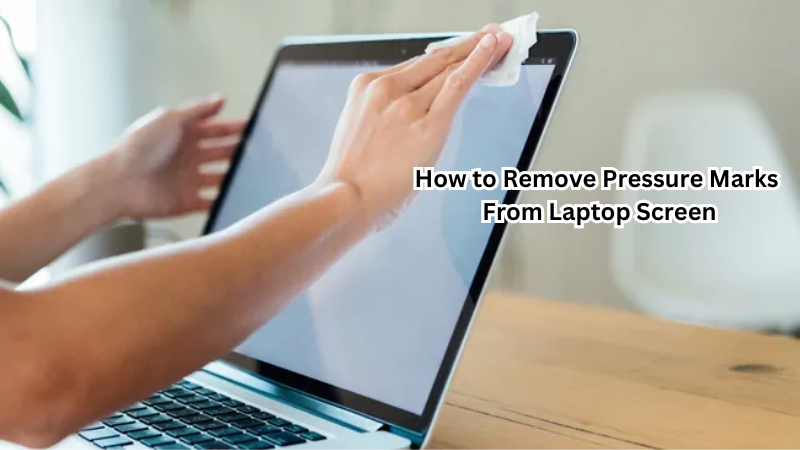
Using a microfiber cloth or an alcohol wipe, thoroughly clean the surface of your device screen to remove any dirt or oils that may prevent the screen protector from adhering correctly.
Always clean with a soft cloth, and a little alcohol will help remove any oils or residue on the screen, ensuring a clean surface for optimal adhesion.
Carefully apply the screen protector:
Peel off one side of the protective film on the screen protector and carefully align it with your device's edges. Slowly lower the protector onto the screen, making sure it is straight and evenly placed. Use a credit card or squeegee to smooth out any air bubbles as you apply the protector.
Lift and reapply:
If you notice any air bubbles forming during the application process, gently lift that section of the screen protector and use a soft cloth or squeegee to push the bubbles towards the edge while applying light pressure. Repeat this process until all air bubbles are removed.
Let it settle:
Once the screen protector is applied and all air bubbles are removed, allow it to sit for a few minutes to ensure proper adhesion. Avoid using your device immediately after application, as this may create new air bubbles.
Give time for the screen protector to fully adhere before using your device.
Check for imperfections:
After the screen protector has settled, check for any remaining small bubbles that may have formed during the settling process. If you notice any, gently push them towards the edge with a soft cloth or squeegee.
Use a hairdryer (optional):
In some cases, using a hairdryer on low heat can help to remove stubborn air bubbles from under the screen protector. Use caution when applying heat, and avoid overheating the device. Excessive heat can cause damage to the device or screen protector.
Consider a screen protector installation kit:
If you frequently struggle with removing air bubbles from screen protectors, consider investing in a screen protector installation kit. These kits typically include tools such as squeegees and dust removal stickers to help achieve a bubble-free application.
These steps can be applied to all types of plastic screen protectors, including plastic and tempered glass. With patience and attention to detail, you can achieve a perfectly smooth and bubble-free application every time.
Tips for Preventing Air Bubbles in Screen Protector Application
To prevent air bubbles from forming during the screen protector application process, consider the following tips:
- Cleanliness is key: Before applying a screen protector, make sure to clean the device screen thoroughly to remove any particles that may cause bubbles.
- Go slow: Take your time when applying a screen protector, and avoid using excessive pressure or rushing through the process.
- Avoid humidity and dust: Try to apply the screen protector in a dry, clean environment to minimize the risk of air bubbles forming.
- Use quality products: Invest in high-quality screen protectors that fit your device properly to minimize the chances of bubbles forming.
- Remove any existing screen protector: If you are replacing an old screen protector, make sure to remove it completely before applying a new one. Any residue left behind can cause air bubbles to form.
With these tips and techniques, you can achieve a bubble-free screen protector application and enjoy a clear, well-protected device. Remember to take your time and be patient during the process for the best results.
Types of Screen Protector Installation Kits
As mentioned earlier, screen protector installation kits can be helpful in achieving a bubble-free application. Here are some common tools and items that may be included in these kits:
- Squeegee: A small plastic tool used to smooth out the screen protector during application.
- Microfiber cloth or alcohol wipes: These are used to clean the device screen before applying the screen protector.
- Dust removal stickers: Small adhesive strips are used to remove any remaining dust or particles from the device screen.
- Alignment tool: Some installation kits may include a guide or alignment tool to help position the screen protector correctly.
- Air bubble removal card: Similar to a squeegee, this tool is specifically designed for pushing air bubbles out from under the screen protector.
- Instructions: Many installation kits come with detailed instructions on how to apply the screen protector for the best results.
By using these tools and following the provided instructions, you can achieve a seamless, bubble-free screen protector application.
Talk to Expert
If you are still struggling with removing air bubbles from your screen protector, don't hesitate to reach out to a professional. They can provide guidance and assistance in achieving a bubble-free application and recommend high-quality products for your device. Investing in the proper installation of a screen protector is crucial for protecting your device and maintaining its value in the long run.
Don't let pesky air bubbles ruin your screen protector experience – take the time to remove them for a flawless finish. So, take care of your device's screen with proper installation of entire screen and enjoy using it without any difficulties.
FAQs
Is it okay to leave bubbles in the screen protector?
It is not recommended to leave bubbles in a screen protector as they can potentially affect the touch sensitivity and overall effectiveness of the protector.
Can you reapply a screen protector?
Yes, you can lift and reapply a screen protector if needed. However, it is best to avoid this as it may decrease the effectiveness of the adhesive. Plus, it increases the chances of air bubbles forming.
Can I wash my screen protector?
It depends on the type of screen protector. Some plastic new screen protector can be washed with water and mild soap, while tempered glass protectors should only be wiped with a damp cloth. Always refer to the manufacturer's instructions for specific care guidelines for your phone screen protector.
Can air bubbles damage screens?
Air bubbles themselves do not usually cause damage to screens, but they can potentially trap dirt and debris, which could lead to scratches on the screen. It is best to remove them for optimal protection of your device's screen.
Conclusion
In conclusion, mastering the technique of removing air bubbles from a screen protector is essential for achieving a professional and sleek installation. By meticulously cleaning the device screen, gently lifting the protector, and using a soft cloth or squeegee to guide the bubbles towards the edges, you can ensure a bubble-free finish that enhances both the aesthetic appeal and functionality of your device.
Consistent and patient application of light pressure while working outwards is key to expelling trapped air and achieving a seamless result. Embracing this process not only safeguards your device from scratches and smudges but also guarantees a crystal-clear display that allows you to enjoy the full functionality of your screen protector to the fullest extent.
