Are you a gaming enthusiast looking to take your Wii gaming experience to the next level?
Connecting your Wii console to a projector can transform your gaming sessions into a larger-than-life experience. With a projector, you can enjoy playing your favorite Wii games on a big projector screen, immersing yourself in the action like never before. The process of connecting a Wii to a projector is relatively straightforward, but it does require a few essential steps.
In this guide, we will walk you through the process, from connecting the necessary cables to adjusting the projector settings. So, grab your Wii remote and get ready to elevate your gaming experience to new heights with a Wii and projector combination!
What Is a Wii And Things Need To Know
Before we dive into the steps of connecting a Wii to a projector, let's briefly go over what a Wii is and some key things you need to know. The Nintendo Wii is a video game console released in 2006, known for its motion-controlled gameplay and popular titles such as Super Mario Bros. and Legend of Zelda. The Wii can be connected to various display devices, including TVs and computer monitors. Wii U, Wii Mini, and Wii Family Edition are the different models of this popular console. Mario Kart Wii, Wii Sports Resort, and Super Smash Bros. Brawl are some of the most popular games on the Wii.
The console's compact design and wireless controllers make it a popular choice for gamers of all ages. Although the Wii doesn't have an HDMI port but instead uses component cables, you should invest in a newer projector for the Wii as much as possible. Whether you have an HDMI or VGA projector, you can easily connect your Wii and enjoy gaming on a larger scale.
When connecting your Wii to a projector, there are a few things you need to keep in mind:
- Check the compatibility of your Wii console: The first thing you need to ensure is that your Wii console is compatible with projectors. Most newer models are compatible, but it's always a good idea to double-check.
- Check the resolution of your projector: Projectors come in different solutions, so make sure yours can support the Wii's native resolution of 480p. If your projector supports higher resolutions, you may need to adjust your Wii settings manually.
- Consider audio output: Most projectors do not have built-in speakers, so you may need to connect external speakers or use headphones for audio while gaming.
Now that we have covered the basics let's move on to connecting your Wii to a projector.
How to Connect Wii to Projector?
We will discuss two methods for connecting a Wii to a projector: an adapter or the Wii's component cables. The first method requires an HDMI to VGA adapter, while the second utilizes the Wii's native cables.
Gather the Necessary Cables
Before you start connecting your Wii to a projector, make sure you have all the necessary cables. You will need:
- HDMI or Component cable: These combine the Wii console with the projector.
- Power adapter: The Wii console has a power adapter that must be connected to an electrical outlet.
- Audio cables: As mentioned earlier, you must connect external speakers or headphones for audio output.
Method 1. Via RCA to HDMI Adapter:
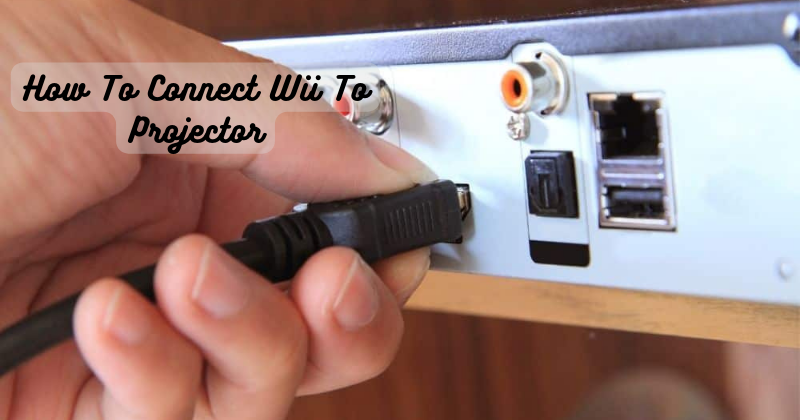
Utilizing an RCA to HDMI adapter provides a convenient solution for connecting your Wii to a projector equipped with an HDMI input. The Wii generates analog signals through its AV Multi Out port, whereas contemporary projectors are designed to receive digital alerts. The adapter is a bridge, transforming the analog output into a compatible digital format. To establish the connection:
- Plug in the HDMI cable end of the adapter to the projector's HDMI input.
- Connect the Wii component cable to the RCA ports on the adapter.
- Connect the other end of the component cable to your Wii console's AV Multi Out port.
- Make sure all connections are secure and tight.
Method 2. Via RCA to VGA Adapter:
Employ an RCA to VGA adapter for projectors equipped with VGA input to connect your Wii. VGA cable is a video-only connection, so you will need to connect audio cables separately. Video cable will go through the RCA to VGA adapter, while audio cables will connect to the projector's audio input. Comparable to the earlier method, the adapter transforms analog signals into digital, ensuring seamless compatibility with VGA inputs. Here's a guide on how to configure the setup:
- Insert the VGA end of the adapter into the projector's VGA input.
- Connect the Wii component cable to the RCA ports on the adapter.
- Attach the other end of the line to your Wii console's AV Multi Out port.
- Check that all connections are secure and snugly fit.
Adjusting Settings and Final Touches
Now that we have established the physical connection between your Wii and projector, there are a few settings to adjust before you can start gaming.
- Turn on your Wii console and select your projector's HDMI or VGA input.
- Go to Settings > Screen > TV Resolution on the Wii's main menu and choose 480p.
- If needed, adjust the display settings on your projector to ensure the image is clear and centered.
- If using external speakers, ensure the audio output is set to "Wii AV" or "Component Cable."
And that's it! With your Wii console and projector, you can start gaming on a bigger screen. Just load up your favorite game, pick up your Wii remote, and get ready to immerse yourself in an unforgettable gaming experience.
How Does the Wii Sensor Bar Work?
Before we conclude, let's quickly touch upon the Wii sensor bar and its role in motion-controlled gameplay. The sensor bar is a small device with a Wii console placed above or below your TV screen. It emits infrared light picked up by the Wii remote to detect movement and translate it into in-game actions. This bar is essential for motion-controlled gameplay and should be placed where it can easily see the Wii remote's activities.
The Wii and projector combo provides a larger display for gaming and creates a more immersive experience with its motion-controlled gameplay. So, ensure your sensor bar is set up correctly, and nothing obstructs its view for smooth gameplay.
Where Should the Sensor Bar Be?
As mentioned earlier, the sensor bar should be placed above or below your TV screen, centered and facing toward the players. Ensure that no objects or furniture obstructs it and can detect movements from a comfortable distance. If you use a projector setup, the sensor bar should be mounted on a stable surface near the projector's position. When everything ready than you can enjoy Wii projector connection as well. With a proper setup, you can enjoy your favorite Wii games on a bigger screen and create memorable gaming moments with friends and family. Wireless sensor bar sure helps without any wires but you have to replace batteries regularly.
The Nintendo Wii has revolutionized the gaming industry with its unique motion-controlled gameplay and vast library of games. And now, by connecting it to a projector, you can take your gaming experience to new heights. So gather your friends and family, set up your Wii and projector, and prepare for endless fun and entertainment!
FAQs
How do you connect a Wii to a screen?
You will need an HDMI or component cable, a power adapter, and audio cables to connect a Wii to a screen. Connect the Wii to the net via an adapter or component cable and adjust the display settings on both devices for optimal performance.
How many GB is Wii?
The Wii console has a built-in memory of 512 MB, but it also supports external storage devices like SD cards and USB drives for additional storage. Some models of the Wii also come with larger internal storage capacities ranging from 1 GB to 4 GB; it needs to be more accurate to measure the Wii's storage in terms of GB alone.
What size are Wii games?
Wii games typically range from 1-4 GB, but some games may require more storage if they contain additional downloadable content. Having at least 8 GB of external storage for a comfortable gaming experience on the Wii is recommended.
Can you use a Wii without a sensor bar?
No, the sensor bar is necessary for motion-controlled gameplay on the Wii. However, some games may offer alternative control options, such as using the Wii remote as a traditional controller, allowing gameplay without a sensor bar. But for the whole Wii experience, it is best to have a functioning sensor bar. So, set it up correctly and keep it in good condition for an optimal gaming experience.
Conclusion
In conclusion, connecting your Wii console to a projector can open up a new world of gaming possibilities. Following the steps outlined in this guide, you can easily connect your Wii to a projector and enjoy your favorite games on a larger screen. Remember to turn off your Wii console and projector before connecting. Use the appropriate cables, such as HDMI or composite cables, to establish the relationship between the two devices.
Once the physical connections are made, adjust the projector settings to optimize the display for gaming. This may involve changing the aspect ratio, resolution, and other visual settings. With your Wii connected to a projector, you can immerse yourself in the action, whether playing solo or engaging in multiplayer battles. So, gather your friends and family, grab those Wii remotes, and get ready to experience gaming in a new dimension. Happy gaming!


