Looking to connect your Roku streaming device to a projector? Look no further!
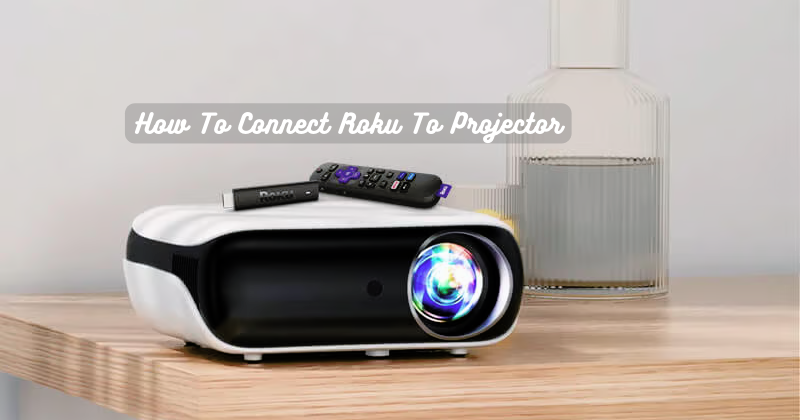
Connecting your Roku to a projector can give you the ultimate big-screen experience for streaming movies, TV shows, and more. You can enjoy your favorite content on a larger scale with just a few simple steps.
In this guide, we'll walk you through connecting your Roku to a projector, ensuring you have all the necessary cables and settings. Get ready to elevate your entertainment with this easy setup. Let's dive in!
What Is A Roku Stick?
Before we get started, let's quickly go over what a Roku stick is.
Roku is a streaming device that allows you to access various online streaming services such as Netflix, Hulu, and YouTube on your TV. It comes in the form of a small stick that plugs into your TV's HDMI port, making it easy to set up and use. Roku types, including Roku Express, Streaming Stick+, and Roku Ultra, are available. Roku smart TV models are also available.
Furthermore, Roku devices offer a user-friendly interface and a remote control for easy navigation. They also have the option to download additional channels and services, making it a versatile streaming device for all your entertainment needs. Roku remote also offers a voice control feature with certain models, allowing you to search for content and control your TV with just your voice.
Options for Connecting a Roku Stick to a Projector
Let's discuss the different options for connecting your Roku stick to a projector.
HDMI Cable
An HDMI cable is the most common and recommended way to connect your Roku to a projector. Simply plug one end of the HDMI cable into your projector's HDMI port and the other into your Roku stick's HDMI port.
MHL Cable
You can use a Mobile High-Definition Link (MHL) cable if your projector does not have an HDMI port. This cable connects to your Roku stick's micro USB port and then to your projector's MHL port. USB cable can also be used to charge your Roku stick.
Wireless Connection
Some newer projectors have built-in wireless capabilities, allowing you to connect your Roku stick without cables. If your projector has this feature, simply connect to the wireless network and select the Roku stick as your source.
A/V Receiver
If you have an A/V receiver, you can also connect your Roku stick to it and then connect the receiver to your projector. This will allow for better sound quality and additional audio options.
How To Connect Roku To Projector :
Setting Up Your Roku Stick for Projector Connection
Before connecting your Roku stick to your projector, ensure you have the cables and a stable internet connection.
Connect via HDMI Directly to the Projector:
A Roku Streaming Stick+ (on Amazon) can be connected to a projector through the HDMI port. To do this, plug one end of an HDMI cable into the HDMI port on your Roku stick and the other end into an available HDMI port on your projector. HDMI audio extractor (on Amazon) can also connect your Roku stick and projector. HDMI input on your projector should be selected to start streaming.
Roku channel store can be installed on the streaming stick so that your HDMI port is connected. You can also control your Roku device by downloading and installing the Roku remote app (on Google Play or App Store) on your smartphone. This allows for easy navigation and voice control.
Connect Via MHL Cable:
You can use a Mobile High-Definition Link (MHL) cable if your projector does not have an HDMI port. This cable connects to your Roku stick's micro USB port and then to your projector's MHL port.
Once connected, select the MHL input on your projector, and you're ready to start streaming. A Roku account may also be needed to access certain channels and services. A VGA adapter (on Amazon) can also be used to connect a Roku stick to the projector if it has a VGA port.
Connect to an A/V Receiver:
Another option is to connect your Roku stick to an A/V receiver and then connect the receiver to your projector. This will allow for better sound quality and additional audio options. Simply connect the HDMI cable from your Roku stick to the appropriate input on your A/V receiver, and then use another HDMI cable to connect the receiver's output to your projector.
Wireless Connection:
If your projector has built-in wireless capabilities, you can connect your Roku stick without cables. Simply connect to the wireless network and select the Roku stick as your source on the projector. This method may require additional setup steps, so consult your projector's manual for instructions.
These are the main options for connecting your Roku stick to a projector. Depending on your specific setup, you may need additional cables or adapters. Now, let's look at some tips for optimizing your Roku and projector connection.
Settings and Configuration
Once you have connected your Roku stick to your projector, you may need to adjust some settings for optimal viewing experience.
- Resolution
Ensure that the resolution on your Roku is set to match the native resolution of your projector. This will ensure the best picture quality.
- Aspect Ratio
Adjusting the aspect ratio on your Roku can also improve the picture quality on your projector. Most projectors have a 16:9 aspect ratio, so set your Roku to this as well.
- Display Type
Sometimes, you may need to manually select the display type for your Roku to work with your projector. You can do this by selecting the appropriate option by going to Settings > Display type.
- Audio Settings
If you are connecting your Roku to an A/V receiver, adjust the audio settings accordingly. You may need to change the audio output to match your setup.
When connecting Roku to the projector, keeping both devices updated with the latest software and firmware updates is important. This will ensure smooth functionality and access to new features.
Enjoy Your Big Screen Experience
That's it! You've successfully connected your Roku stick to a projector and optimized the settings for the best viewing experience. Now sit back, relax, and enjoy all your favorite movies, TV shows, and more on the big screen.
Just remember, when you're done using your projector, make sure to disconnect your Roku stick properly and power off the device as well. This will help prolong the life of your streaming device and ensure it is ready for your next movie night or binge-watching session. Roku sticks offer great convenience and versatility, making it the perfect device to pair with your projector for an ultimate home theater experience.
In addition to connecting a Roku stick to a projector, you can also connect other streaming devices, such as Amazon Fire Stick or Google Chromecast, in a similar way. With the ability to connect easily and access various streaming services, projectors are becoming increasingly popular for home entertainment. So why not give it a try and enhance your viewing experience today? Happy streaming! #
Other Tips for Using a Projector with Roku
Now that you have successfully connected your Roku stick to a projector, here are some additional tips for using your projector with Roku that you may find helpful:
- Make sure both your Roku stick and projector are updated with the latest software for optimal performance.
- Consider investing in a universal remote so you can control both your projector and Roku with one remote. This will make navigating between sources and adjusting settings easier.
- If your projector does not have built-in speakers, consider connecting external speakers or a soundbar for better audio quality.
- Use the voice control feature on your Roku remote to search for content hands-free and make the viewing experience even more convenient.
- Experiment with different streaming services and channels to find new and exciting content to watch on the big screen.
With these tips in mind, you can make the most out of your projector and Roku setup for an immersive and enjoyable streaming experience.
FAQs
How do I connect my Roku remote to my Roku projector?
To connect your Roku remote to your projector, you will need to download and install the Roku remote app on your smartphone. Then, make sure both devices are connected to the same wireless network. Open the app and follow the instructions to pair it with your Roku stick.
Can I use any projector with a Roku stick?
As long as your projector has an HDMI or MHL port, you should be able to connect your Roku stick. However, some projectors may require additional adapters or cables for compatibility.
Why would my Roku projector not turn on?
There could be a few reasons why your Roku projector won't turn on. Ensure all cables are securely connected, and check if the device has power. If it still doesn't turn on, try resetting the device or consulting the manufacturer's manual for troubleshooting steps.
Why is my Roku not showing up on HDMI?
If your Roku stick is not showing up on HDMI, try disconnecting and reconnecting the HDMI cable or using a different port on your projector. You can also try restarting both devices or adjusting the display type setting on your Roku. If the issue persists, consult the manufacturer's manual for further assistance.
Conclusion
In conclusion, connecting your Roku to a projector is a straightforward process that greatly enhances your streaming experience. Following the steps outlined in this guide, you can enjoy your favorite movies, TV shows, and more on a larger screen, bringing cinematic entertainment into your living room or any other space.
Remember to check the specifications of both your Roku device and projector to ensure compatibility and select the appropriate cables for the connection. With the right setup and settings, you can unlock the full potential of your Roku and enjoy an immersive viewing experience. So grab your popcorn, dim the lights, and get ready to be captivated by your favorite content on the big screen. Happy streaming!


