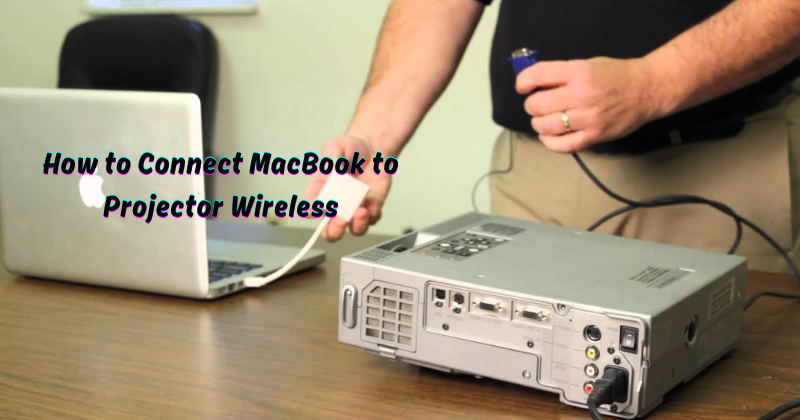
Are you tired of fumbling with cables and adapters every time you want to connect your MacBook to a projector? Well, fret no more! Connecting your MacBook to a projector wirelessly is not only convenient but also hassle-free.
With just a few simple steps, you can seamlessly display your screen on a bigger canvas without the need for any physical connections. By utilizing AirPlay, a built-in feature in macOS, you can easily mirror your MacBook's screen to a wireless projector. Whether you're giving a presentation, enjoying a movie night, or showcasing your work, this wireless connection method ensures a smooth and effortless experience.
This article will guide you through the steps to connect your MacBook to a projector wirelessly. Say goodbye to tangled cables and embrace the freedom of wireless connectivity!
Brief Overview of the Benefits of Wireless Connection
Now that we've explored the advantages of wirelessly connecting your MacBook to a projector, let's delve into the seamless process that enhances your presentation experience. First and foremost, the elimination of cables minimizes setup time and simplifies the entire process, allowing for swift preparation and easy packing post-use.
The increased mobility afforded by a wireless connection liberates you from the constraints of cable lengths, providing the freedom to move around effortlessly while presenting. Moreover, the utilization of AirPlay ensures a superior display quality, free from interference caused by cables or adapters.
This wireless setup not only facilitates smooth multitasking but also makes it effortlessly user-friendly, allowing you to switch between applications and showcase various content types with ease. Now, let's embark on the straightforward steps to connect your MacBook to a projector wirelessly.
How to Connect MacBook to Projector Wireless:
How to Connect a Mac to a Projector Wirelessly (with or without Wi-Fi)?
Connecting projector wirelessly is made possible by utilizing the AirPlay feature, which allows you to mirror your MacBook's screen to an Apple TV or any other compatible device. The process is simple and can be done with or without Wi-Fi connectivity. Weather you in bussiness or a student, this guide will help you connect your MacBook to a projector wirelessly.
Let's explore both methods in detail:
Check Your Mac's Compatibility with Projector
Before we begin, it's essential to ensure that your MacBook is compatible with the projector you intend to connect wirelessly. For Macs released in 2011 or later, AirPlay Mirroring is supported. Additionally, Macs running on macOS Catalina or later versions must have an Apple TV (2nd generation or later) with software version 5.0 or later.
To check the compatibility, click on the Apple logo in the top left corner of your screen and select "About This Mac." The "Overview" tab will display your MacBook's model and year of release. If it matches the criteria mentioned above, then you're all set to proceed with the wireless connection process.
Method 1: Using Wi-Fi
Wi-Fi Compatibility Check:
Before you begin, ensure that both your MacBook and the projector are connected to the same Wi-Fi network. If not, connect them to the same network assigns addresses automatically before proceeding.
Connect Projector to Wi-Fi:
If your projector has a built-in Wi-Fi feature, you can connect it to the same network as your MacBook. This step may vary depending on the projector's model and brand, so refer to the user manual for specific on screen instructions.
MacBook Projector Settings:
On your MacBook, go to "System Preferences" and select "Displays." In the bottom-right corner, click on "AirPlay Display," and select the name of your projector from the list. If you want audio output through the projector, check the box next to "Show screen mirroring options in the menu bar when available."
Connect Mac to Projector:
Finally, click on the AirPlay icon in the menu bar and select "Mirror Built-in Display." Your MacBook's screen will now be mirrored on the projector wirelessly.
Adjust Display Preferences:
To adjust the display preferences, go to "System Preferences" and select "Displays." From here, you can change the resolution, arrangement, and other settings for your MacBook's screen on the projector.
Method 2: Using AirPlay (for Apple TV or AirPlay-compatible Projectors)
Apple TV Setup:
Verify that your projector is equipped with either an Apple TV or built-in AirPlay compatibility. Establish a physical connection by linking the Apple TV to the projector using an HDMI cable. Confirm that both the Apple TV and your Mac are seamlessly connected to the identical Wi-Fi network.
Enable AirPlay on MacBook:
On your MacBook, click on the AirPlay icon in the menu bar and select "Mirror Built-in Display." Your screen will now be mirrored to the projector.
AirPlay Mirroring:
To adjust the settings or to stop mirroring, click on the AirPlay icon in the menu bar and select "AirPlay Display." From here, you can change the resolution, arrangement, and other settings for your MacBook's screen on the projector. To stop mirroring, simply click on "Turn Off AirPlay Display."
Congratulations! You have successfully connected your MacBook to a projector wirelessly. Enjoy the convenience and freedom of wireless connectivity, eliminating the hassle of cables and adapters. Make your presentations more engaging and entertaining with this seamless setup.
Additional Tips for an Enhanced Wireless Connection Experience
- Keep both your MacBook and projector's software up to date to ensure compatibility with the latest features.
- Utilize a strong Wi-Fi connection for seamless display quality.
- Familiarize yourself with the display preferences on your MacBook and adjust them according to your presentation needs.
- For optimal audio output, connect external speakers to your MacBook or Apple TV instead of relying solely on the projector's built-in speakers.
- Always have a backup plan in case of any technical difficulties, such as having a cable connection available if needed.
- Experiment with different display arrangements and resolutions to find the perfect fit for your presentation.
- Have fun and be creative with your wireless setup by incorporating interactive elements or using multiple devices for collaborative presentations.
With these tips, you can elevate your wireless projection experience and make the most out of your MacBook's capabilities.
Mistakes to Avoid when Connecting Your MacBook to a Projector Wirelessly
- Not checking compatibility beforehand and encountering technical issues during the presentation.
- Not having a strong Wi-Fi connection, resulting in poor display quality or disrupted mirroring.
- Forgetting to adjust display preferences, causing distorted visuals on the projector.
- Relying solely on the projector's built-in speakers for audio output, leading to poor sound quality.
- Not having a backup plan in case of any technical difficulties.
- Using the default display settings without experimenting and finding the best fit for your presentation.
By avoiding these common mistakes, you can ensure a smooth and successful wireless connection between your MacBook and projector. Now go out there and give an unforgettable presentation with the help of this guide!
FAQs
How do I enable the wireless LAN power setting on my MacBook to connect it wirelessly to a projector?
To enable the wireless LAN power setting on your MacBook, go to "System Preferences" and select "Network." Then, choose the Wi-Fi option and click on "Advanced." From there, you can enable the wireless LAN power setting.
Do both my MacBook and the projector need to be connected to the same wireless network for wireless connectivity?
Yes, for wireless connectivity between your MacBook and the projector, both devices need to be connected to the same wireless network.
How do I connect my MacBook to a specific access point when setting up a wireless connection with a projector?
To connect your MacBook to a specific select search access point, go to "System Preferences" and select "Network." Choose the Wi-Fi option and click on "Advanced." In the list of available networks, click on "Other" and manually enter the network name (SSID) of the access point you want to connect to.
Can I connect my MacBook to a wireless LAN module projector using the HDMI port?
No, the HDMI port is used for transmitting audio and video signals and does not support wireless connectivity. To connect wirelessly, you need to use the wireless LAN module and follow the appropriate setup steps.
How do I find the projector's IP address to complete the wireless connection setup?
To find the projector's IP address, access the projector's menu settings or consult the projector's user manual. The IP address is typically listed under the network or network settings section.
Conclusion
In this guide, we discussed two methods for connecting a MacBook to a projector wirelessly. With the use of AirPlay or built-in Wi-Fi capabilities, you can easily mirror your screen onto the projector without any cables or adapters.
We also provided additional tips and advice for an enhanced wireless projection experience and common mistakes to avoid. Now it's time to put this knowledge into practice and give a stellar wireless presentation! So, don't hesitate to try out these methods and elevate your presentation skills. Happy projecting!


