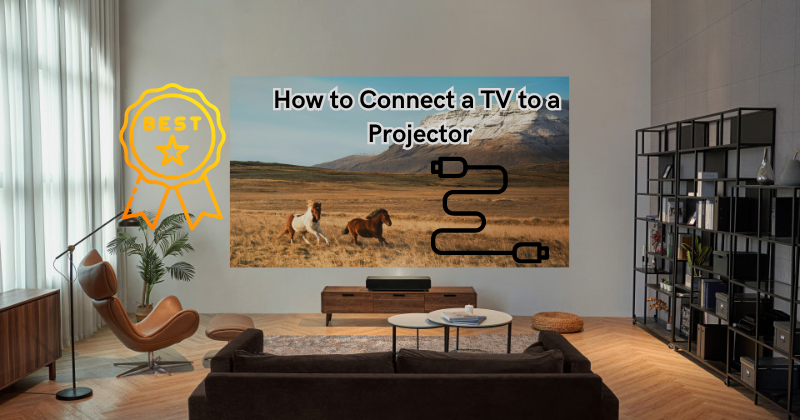
In a world where entertainment and visual experiences are paramount, the ability to seamlessly connect a TV to a projector opens the door to a myriad of possibilities.
Whether it's for a home theater setup, gaming immersion, or professional presentations, this integration offers flexibility and expanded visual impact. The process of connecting a TV to a projector involves a few key steps, from selecting the right cables to configuring input settings.
This guide aims to provide a clear, step-by-step approach to help you successfully link your TV and projector, enabling you to enjoy a versatile and dynamic viewing experience that caters to your unique needs.
Importance of the Right Projector and TV Setup
Before diving into the technical aspect of connecting a TV to a projector, it's essential to understand why this integration is beneficial.
Firstly, projectors have significantly larger screens compared to TVs, making them ideal for large gatherings or creating an immersive experience at home. Additionally, projectors also offer better portability, allowing you to enjoy your favorite content outdoors or in different rooms easily. And projector as a TV is also a cost-effective solution for those who want a larger screen but don't want to invest in an expensive TV.
On the other hand, TVs are best suited for smaller group settings and offer superior image quality when compared to projectors. Watch TV series and movies in high definition, play video games with stunning graphics, or conduct meetings with clear visuals – all on your TV.
By linking both the projector and TV, you can have access to both large-screen capabilities and high-resolution visuals, providing an all-encompassing viewing experience. Projector screen sizes can range up to 300 inches, while TVs typically max out at around 85 inches, allowing for a versatile and customizable visual experience.
Understanding the Available Ports and Connectivity Options on Both the TV and Projector
Before connecting any cables, the first step is to understand the available ports and connectivity options on both your TV and projector. These ports are essential for transferring audio and video signals from one device to another.
Most modern TVs have several HDMI inputs, which is the most common connection used for high-definition devices like projectors. Some TVs may also have VGA, DVI, or Component inputs, which are older connection options and may require adapters to connect to the projector.
Projectors also have multiple input options, with HDMI being the most common. However, some projectors might only have VGA or Composite inputs, so it's crucial to check for compatibility beforehand.
You can also connect cable boxes, gaming consoles, and Blu-ray players to add more input sources. Enjoying video games on a large screen can be an exhilarating experience. Once you've identified the available ports on both devices, gather all necessary cables and adapters to ensure seamless connectivity.
Verifying if any Additional Adapters or Cables Are Required for the Connection
In some cases, additional adapters or cables may be required to connect the TV and projector successfully. For example, if your TV only has HDMI inputs but the projector only has VGA input, you will need an HDMI to VGA adapter. Similarly, if both devices have different types of ports, you might require specialized cables such as DVI to HDMI or Component to HDMI.
How to Connect a TV to a Projector
Connecting a TV to a projector is relatively simple and can be completed in just a few steps. Here's how a wire connection is established:
Place the Projector:
Set up your projector at an optimal distance from the wall or screen where you want to project the image. Ensure that there is enough space for cables and ventilation around the projector. You may need to adjust the zoom, focus, and keystone settings to get the perfect image size and clarity.
Place the TV:
Position your TV in front of the projector screen or wall, keeping in mind that it should be able to connect to the projector easily without any tangled wires. TV tuner cards or boxes can help receive channels without the need for an additional cable box. Android TV or smart TV provides access to streaming services and a range of other apps.
Power Up:
Connect both devices to a power source and turn them on. It's essential to have both devices turned off before proceeding to the next step. Traditional TV or Normal TV and projectors often have a warm-up time before they're ready to use. So, it's best to turn them on first.
Connect the HDMI Cable:
Use an HDMI cable to connect your TV's HDMI output port to one of the projector's available input ports. Be sure to note which input port you are using on your projector for future reference. HDMI port is typically marked as "HDMI 1", "HDMI 2", etc. HDMI ports also support audio, so you won't need any additional cables for sound.
If a video graphics array (VGA) cable is the only option, use an HDMI to VGA adapter and connect it accordingly. Cable boxes, gaming consoles, or Blu-ray players can also be connected in a similar fashion.
Configure Input Settings:
Using your projector remote, select the input source you connected the HDMI cable to. This input will display the image from your TV, and you should now be able to see your TV's content projected on the screen or wall.
Adjust Settings:
Use your TV remote to adjust any aspect ratio, picture mode, or other settings as needed for optimal viewing. You can also use this remote for controlling media playback when connected to the projector.
Enjoy:
With everything set up and configured, you can now sit back and enjoy your favorite content on a larger screen! Experiment with different input sources, settings, and positioning for a truly customizable viewing experience.
Wireless Connection Also Available
Now, we discuss two methods to connect the projector and TV using wireless connections.
Miracast or Screen Mirroring:
Miracast is a technology that allows you to mirror your smartphone, tablet, or laptop screen wirelessly onto the projector screen.
You can use this feature if your devices and projector support it. Screen mirroring can be accessed from the Quick Settings menu on your device and is usually marked as "Smart View", "Screen Cast", or "Cast Screen".
A television streaming app and software can also be used for screen mirroring. Streaming devices like Chromecast can also connect projectors and TVs. YouTube TV, Roku TV or Netflix can be used for streaming.
Here is a step-by-step guide to connecting your TV and projector using Miracast:
- Step 1: Turn on the Wi-Fi feature of your smartphone, tablet, or laptop.
- Step 2: On your device, go to Settings > Display > Wireless display (or similar option).
- Step 3: Select your projector from the list of devices displayed.
- Step 4: Enter the PIN displayed on your projector screen if prompted.
- Step 5: Your device's screen should now be mirrored on the projector screen.
Using a Wireless HDMI Transmitter and Receiver:
Another way to connect your TV and projector wirelessly is by using a wireless HDMI transmitter and receiver set. These devices work by sending audio and video signals wirelessly between them, eliminating the need for cables. A separate streaming device is not needed for this method.
Here's how to set it up:
- Step 1: Connect your TV's HDMI output port to the transmitter using an HDMI cable.
- Step 2: Connect the receiver to the projector using another HDMI cable.
- Step 3: Turn on both devices and make sure they are in range of each other.
- Step 4: The transmitter and receiver should automatically pair and display your TV's content on the projector screen.
For best picture quality, the component cable can be an option. Component video cable usually consists of three separate cables for video and two for audio.
To connect a TV and projector using component cables, follow these steps:
- Step 1: Connect the component cables to your TV's component output ports (usually color-coded red, green, and blue).
- Step 2: Connect the other end of the cables to your projector's component input ports.
- Step 3: For audio, connect the two separate audio cables (usually color-coded red and white) from your TV's audio output ports to the projector's audio input ports.
- Step 4: Turn on both devices and select the component input source on your projector remote. Your TV's content should now be projected onto the screen or wall.
Whether you choose to connect your TV and projector using cables or wirelessly, both methods are relatively straightforward and can provide an enhanced viewing experience.
Tips for Optimal Viewing:
- Ensure that both devices are compatible and have the necessary ports for connecting.
- Make sure to turn off any power-saving or auto-sleep settings on your devices to prevent interruption during use.
- Experiment with different positioning of the projector and TV for the best image quality and viewing experience.
- Regularly clean the projector lens for better clarity and image projection.
- Use a stable and secure mount or tripod for the projector to prevent any accidental falls or damage.
By following these simple steps and tips, you can easily connect your TV and projector for an enhanced viewing experience in no time.
FAQs
Do projectors take HDMI?
Yes, most projectors have at least one HDMI port for connecting to devices like TVs, gaming consoles, and streaming devices. However, it is always best to check the specifications of your specific projector model before making a purchase.
Can you use a projector without HDMI?
Yes, there are multiple ways to connect a projector without using HDMI. These include using VGA cables, component cables, or wireless options like Miracast and wireless HDMI transmitters/receivers.
Does a projector need Internet?
No, a projector does not require internet access to function. It is simply a display device that projects images and videos from connected sources. However, if you plan on using streaming services or online content with your projector, then an internet connection would be necessary for those purposes.
How do I display my screen on a projector?
To display your screen on a projector, you can use an HDMI cable or wireless options like Miracast and wireless HDMI transmitters/receivers.
Conclusion
With the ever-expanding array of multimedia content and the increasing demand for immersive visual experiences, the fusion of a TV and a projector opens up a realm of possibilities. By following the steps outlined in this guide, you can seamlessly connect these devices to create a versatile and dynamic viewing environment.
Whether it's for enjoying cinematic movie nights, engaging in thrilling gaming sessions, or delivering impactful presentations, the amalgamation of a TV and a projector offers boundless potential. This integration not only enhances your entertainment and productivity but also provides the flexibility to adapt to various contexts and needs.
Embrace the fusion of technology, expand your visual horizons, and elevate your viewing experiences with the harmony of a connected TV and projector.


